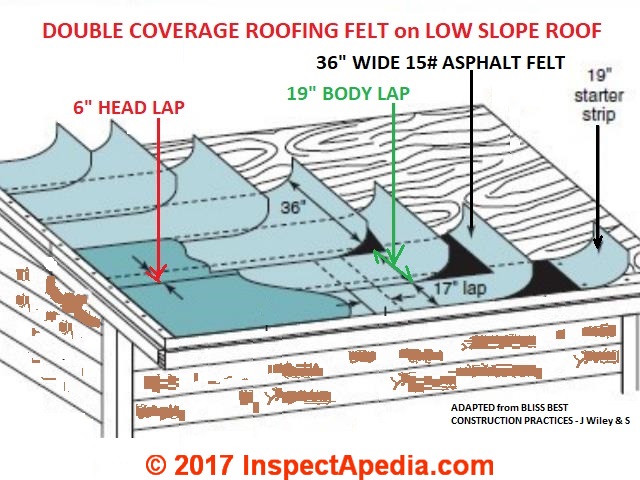
Rolled Roof Felt Nailing Pattern

The Standard Nailing For Asphalt Shingles Is A Four Nail Pattern With Nails Placed 1 Inch From Each End Of Each Shingle And Then Shingling Diy Roofing Roofing

30 Standard Saturated Felt Roofing Underlayment Atlas Roofing
Double Vs Single Layer Felt Underlayment On Roofs
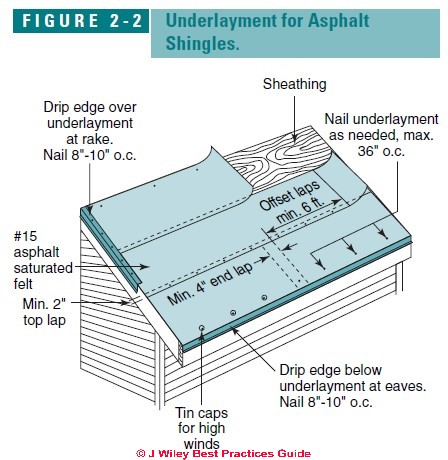
Roof Underlayment Requirements Recommendations Is Roofing Felt Necessary

Metal Roofing Screw Placement Metal Roof Installation Roofing Diy Roof Installation

Tile Roof Rooftopgarden Rooftop Garden Drawing Drawing Drawing 2020

Tear out the sheathing that is emerging out of the valley.
Rolled roof felt nailing pattern.

Pin On Your Pinterest Likes

How To Attach Roof Felt On A Shed 15 Steps With Pictures
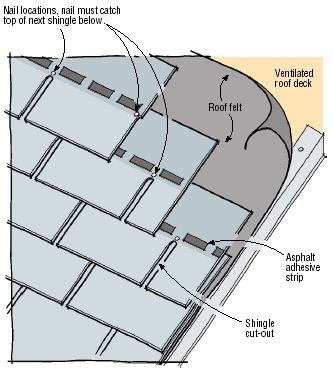
Q A Asphalt Shingle Nailing Jlc Online

Flat Roof Inspection With A Focus On Modified Bitumen The Ashi Reporter Inspection News Views From The American Soc In 2020 Flat Roof Roof Inspection Roof Detail
Source : pinterest.com
